See also: VIDEO – How to create a CSV for uploading client email addresses
- Quickly add many email addresses or phone numbers (if you’ve added SMS) to your drip campaign
- Create a CSV or XLSX using most spreadsheet programs (e.g. Excel, Google Sheets, Numbers)
While you can manually enter campaign recipients one by one, we also allow you to bulk upload recipients using a .CSV (Comma Separated Values) or .XLSX (MS Excel) spreadsheet. Our automated email drip campaigns allow you to have up to 100 active recipients at a time, but you can have up to 5,000 pending recipients at any given time.
1) Create a .CSV or .XLSX file
Using spreadsheet software like Excel or Google sheets, create a new file with three columns (A, B, and C).
In columns A, B, and C, insert email_address, first_name, and last_name into the first row of each respective column. These are your headers, and they’re necessary for your CSV to upload properly.
Note: If your headers don’t match our guidelines, you will be prompted to match them after uploading the CSV.
SMS
If you have SMS enabled and are uploading phone numbers, you can replace the email_address field with phone_number.
Multi-location profiles
If you have a multi-location profile and wish to maintain separate email campaigns for each location, you can use the shortname tag to specify a location using the profile’s associated shortname. Create an additional column (column D) with the header titled shortname. With shortnames you will only need one CSV to upload to all locations.
Note: if no shortname is listed in the CSV, the recipient will be added to the recipient list of whichever profile you uploaded from.
Recipient tags
If you want to tag your recipients – e.g. adding a “january” tag to identify a recipient who completed a transaction in January; or “frank” to identify a recipient who was helped by Frank the salesman – you can create an additional column with the header tags.
When entering multiple tags for the same recipient, separate each tag with a comma.
Custom field placeholder
If you’d like to include data for the [[recipient_custom_field_1]] placeholder, you can add the custom_field_1 header to your CSV.
2) Add in your contacts
Begin filling the blank rows with your recipient data.
If you have SMS enabled on your profile, the CSV can also accept your customer phone numbers. The following phone number formats are acceptable:
- (123) 456-7890
- 123-456-7890
- 1234567890
You can place email addresses and phone numbers in the same file – simply add a phone_number column in column B of your CSV (placing first_name and last_name in C and D, respectively). You can add an email address and phone number for the same recipient and both an email and text will be sent to that recipient, just make sure to put them under their own respective headers.
The finished CSV file could look similar to this:

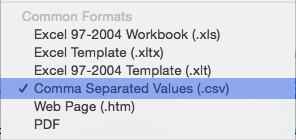
IMPORTANT: To avoid errors, make sure your document doesn’t contain any blank rows or unnecessary information. When you’re done, make sure to save the sheet in .XLSX or .CSV format (the latter is not the default setting of most programs).
Once you’ve created your CSV recipient list, the next step is to upload it into your account.